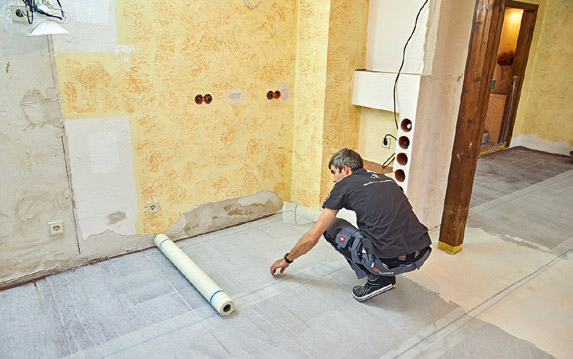
1. Cleared out: Due to the pending kitchen renovation (in the rear area), the dining room also had to be cleared out for the continuous floor redesign.

2. For the cooking island a hob with extractor fan downwards was planned. For this purpose, a duct was laid in the tiled floor – with exhaust air to the outside.

3. Clean the old tiled floor with a leaching/degreasing agent mixed with water.

4. The liquid is applied thickly with a brush and spread over the surface. By acidifying (leave the wetness to work for about 20 minutes) old residues are removed.

5. Wash the tiled surface thoroughly with a mop using neutral water and then allow the surface to dry.

6. The primer is a special primer, which is rolled up lengthwise and crosswise with a pile roller. Drying time: 1 to 1.5 hours.

7. In our case, a separate reinforcement was applied to the threshold area between the kitchen and dining room before the floor was …
 8. The entire tile surface was laid with a 10 cm overlap This is not always urgently necessary, but was carried out here for safety’s sake, especially as the tiled floor in the kitchen area is based on a beam construction.
 Knowing how to do it
In order to obtain the best possible level surface for the later visible floor (the beige jointless micro-cement coating), the dry base coat is sanded down (after about one week). The rotary sander is equipped with a 40 grain sanding disc. The entire surface is then carefully sanded.

High-quality appearance: floor coating and kitchen furniture in a matt surface look.
A dreamlike, gentle solution – that’s how you could sum up this holistic and extremely successful kitchen-dining room modernisation right from the start. And it was also immediately clear from the outset: in addition to the modern kitchen furnishings, it is above all the redesigned flooring that creates the decisive new overall impression. More than thirty years ago, a kitchen was created that was oriented towards the country house style of the time with the cotto trend. The kitchen area – although already open to the dining room – had been fitted with dark red cotto-like ceramic tiles in the format twenty by twenty. The kitchen itself in country house style. Everything is actually harmonious in itself. So why change anything? Well, the kitchen had become quite worn out in the meantime and was functionally impaired in everyday life with clear deficits. But the dark tiled floor in particular was no longer convincing: many wide and deep joints, an uneven installation overall and a difference in level at the threshold to the kitchen area, where a partition wall had once been removed.
Gentle approach instead of a dusty act of violence
In short, modernisation was urgently needed. “Dreamily softly solved”, that is our summary. And there are two reasons for this. Wonderful because the new floor created a trendy and chic surface, wonderful because this solution made it possible to avoid having to tear out the old tiled floor and wonderful because the floor could be perfectly adapted to the new kitchen furnishings.

9. A base filling is produced with a stable dry mortar. Add the powder …

10. mix with so much water that the result is a consistency similar to apple puree. Because now the material must be lightly …

11. … rubbed into the reinforcement fabric, which serves to level the joint grid in the first step.

12. Proceed in partial areas – i.e. always prepare new material and process wet in wet.
Gentle? Yes, despite the enormous redesign effect, the measures were carried out without major interventions in the building fabric. Also without major dirt and noise. And also with regard to the furnishing style, it was possible to approach a gentle modernisation. The charm of the old ceiling beams and sash bar windows could thus be integrated into a modernised kitchen environment. A trend-oriented floor design, a sophisticated construction technique, but with the gentle grace and aesthetics of a handcrafted surface – this is what is impressively convincing here.
Due to the open dining-room-kitchen situation, it was obvious – both in terms of kitchen planning and floor design – to provide a simple, consistent look.
What to do if the floor has different heights?
In addition to simply filling old, deep tile joints, it can happen – as it did with our renovation work – that an old floor has different levels. Then everything must be levelled with a levelling compound – wet in wet and in partial areas. There is a suitable solution for our levelling floor.

1. A special stable putty is prepared for this purpose.

2. First determine the area of the height compensation using a spirit level

3. Always put one bag of powder (25 kg) in 6.5 l of water.

4. Mix the material without lumps. The mass is …

5. … then so pourable and flowable that they can easily …

6. … with the squeegee (toothed rail 3 mm high) …

7. … can be distributed on the surface at the same height.

8. Very important: Remove air inclusions with a spiked roller.

9. Set the rail higher for height compensation.

10. The floor is thus at a continuous level.

13. The product change for the visible floor: Primer, levelling powder, pigment and resin – this is what the new floor is made of, replacing the old tiles in a modern and trendy way.

14. First of all, a primer is applied with a thick fur roller, which ensures optimal adhesion of the coating to the base coat.


The kitchen was equipped with a cooking island, which still provided enough space for the surrounding floor area. The unobtrusive cupboard fronts in the Magnolia matt version gently recede into the background and create a bright, friendly atmosphere.
And this is exactly what should radiate into the room from the floor. Where the concrete look is currently in demand, grey has been deliberately replaced by limestone beige in a natural colour. And in one nuance,which then forms a clear but gentle contrast to the fronts.
Modernisation goal:
Covering old tiles
Come to the technical details of the floor construction required here. The old tile covering was still firmly glued, so it was no problem for our layered construction. Our final floor – a micro-cement levelling compound – had to wait for some preliminary work before it could be applied twice. Problem number one: the wide joints.
Problem number two: The difference in height between the kitchen floor and the dining room floor.
The first step was to level the deep embossed joint grid. For this purpose, a base filler was applied. To prevent cracks later,
this was done with a fabric embedding, especially since the tiled floor in the kitchen area is laid on a wooden supporting substructure and carrier plate. Compared to the dining area, this was also approximately one and a half centimetres higher, which was previously “ramped” with the tiles. This should now all come to a level. For this purpose, a larger area had to be “leveled up” from the threshold far into the dining room with a stable levelling compound.
Only then was it the turn of the actual design theme. The special micro-cement filler was then used for this.

15. Weigh the powder in buckets of 5 kg each and prepare several buckets depending on the size of the area. For our floor 6 buckets were necessary.

16. Then a bag of pigment is placed on a container of resin (4.5 l each). Then close the canister and shake the contents well.

17. The liquid must then be transferred to another container up to an exact quantity of 1150 ml and then …

18. … to be put into another larger processing bucket. Because in this bucket, finally …

19. the micro-cement powder is filled in. The mixing ratio per bucket (see fig. 15) must always be maintained!

20. Whisk powder and pigment resin liquid well. The quantity is then sufficient for about 5 square metres of floor space.

21. 6 buckets for 30 square metres. If a second person prepares these buckets at a time, the material can be …

22. applied quickly with a smaller trowel. Always …

23. … out of the depth of the surface and pull the material in again. Avoid sharp boundaries between the partial areas and work diagonally in the room!

25. Then vacuum everything clean, because now the final layer of filler follows.

24. After at least 3 hours drying time (or more depending on the room situation/air humidity), scrape off thicker burrs or unevenness with the trowel edge.

26. This is also applied in a thin layer. Warp and press the material and make sure that the thickness of the layer is even.
Calming floor space, restrained furniture fronts and a breakfast table that is strongly accentuated with wood decor.


27. Especially with the second layer, it is important to work quickly, wet in wet, to achieve a uniform surface appearance.

28. A first overall impression after completion of the second order. And already at least one hour after completion – after having checked the walkability – it can be removed again with the steel trowel.


29. After complete drying out, a continuous fine sanding with an 80 grain sanding disc is carried out in preparation for the final sealing.

30. For the remaining areas you need a hand sanding machine and apply a corresponding 80 mm abrasive fleece. This way you can …

31. … work on the edges or the floor surfaces under radiators. With an extraction system the whole thing remains relatively dust-free.

32. Last but not least, surface protection: A two-component sealing wax system consisting of component A (the primer) and component B (the hardener) is used.

33. For the first varnish application we used the gloss version. A part of it was decanted into a bucket – so the mixture can be done more exactly.

34. Add the hardener in the prescribed quantity, then mix well. We start …

35. the areas close to the wall and paint a wider strip with a radiator brush.

36. A nylon roller (parquet lacquer roller does not produce air bubbles!) with a diameter of approx. 60 mm is best suited for the surface. Work lengthwise and crosswise.

37. Also during the second varnishing process (after at least 3 hours and now with the matt version) guide the roller with light pressure.
Here, a certain amount of experience is required to prepare the fine powder in the correct mixing ratio. Our processor has specialised in this and was also able to carry out the manual processing correspondingly quickly.
The floor area as an absolute
unique specimen
Keyword craftsmanship: With such a trowelled floor, the result is a unique floor surface shaped by the craftsman. The material becomes thin grown, processed in partial areas – but wet in wet – into each other and compacted with the trowel. The surface appearance then changes from smoothly pressed to somewhat more open and scratched, shows the traces of the tool pull and also depicts colour nuances.
In order to still achieve a uniform overall surface appearance, it is advisable to prepare the material in individual slices, especially when applying the second coat, which shows the final appearance of the floor design. That means keeping buckets of powder in stock by weight in advance, so that the freshly shaken pigment-resin mixture can be added quickly. Finally, to ensure that the new cement floor coating is also suitable for everyday use – i.e. easy-care and stain-resistant – a special coating is applied after the second layer of levelling compound has dried through, also in two work steps. Here you can even choose between gloss and matt.
Now there is a matt finish on our floor,warm beige double layer over the old tiles. Their gentle minimalism creates a modern aesthetic on the one hand, but on the other hand also harmonises with traditional details, such as the ceiling beams or the brown glazed wooden windows. The straight-lined, modern kitchen furnishings take up this aesthetic aspect in a benevolent manner: High-tech and craftsmanship in a successful symbiosis, the spatula floor has made a significant contribution to this.

38. The final touch for the kitchen: the still white walls are slightly tinted – matching the colour of the spatula floor.
39. And then the kitchen fitters arrived. Starting in the corner of the room, the cooking island followed immediately.
Further information
The jointless surface system is available under the name Futado, supplier: www.volimea.de. Our floor construction consists of the following layers or products: Fabric and base filler with Futado Stable, height levelling with Futado levelling compound, primer application with Futado Fix Primer, cement floor with Futado White as well as pigment plus resin (for the colour FU-203 Limestone Beige), sealing with Futado Sealing Lacquer plus Hardener (1 x glossy and 1 x matt).